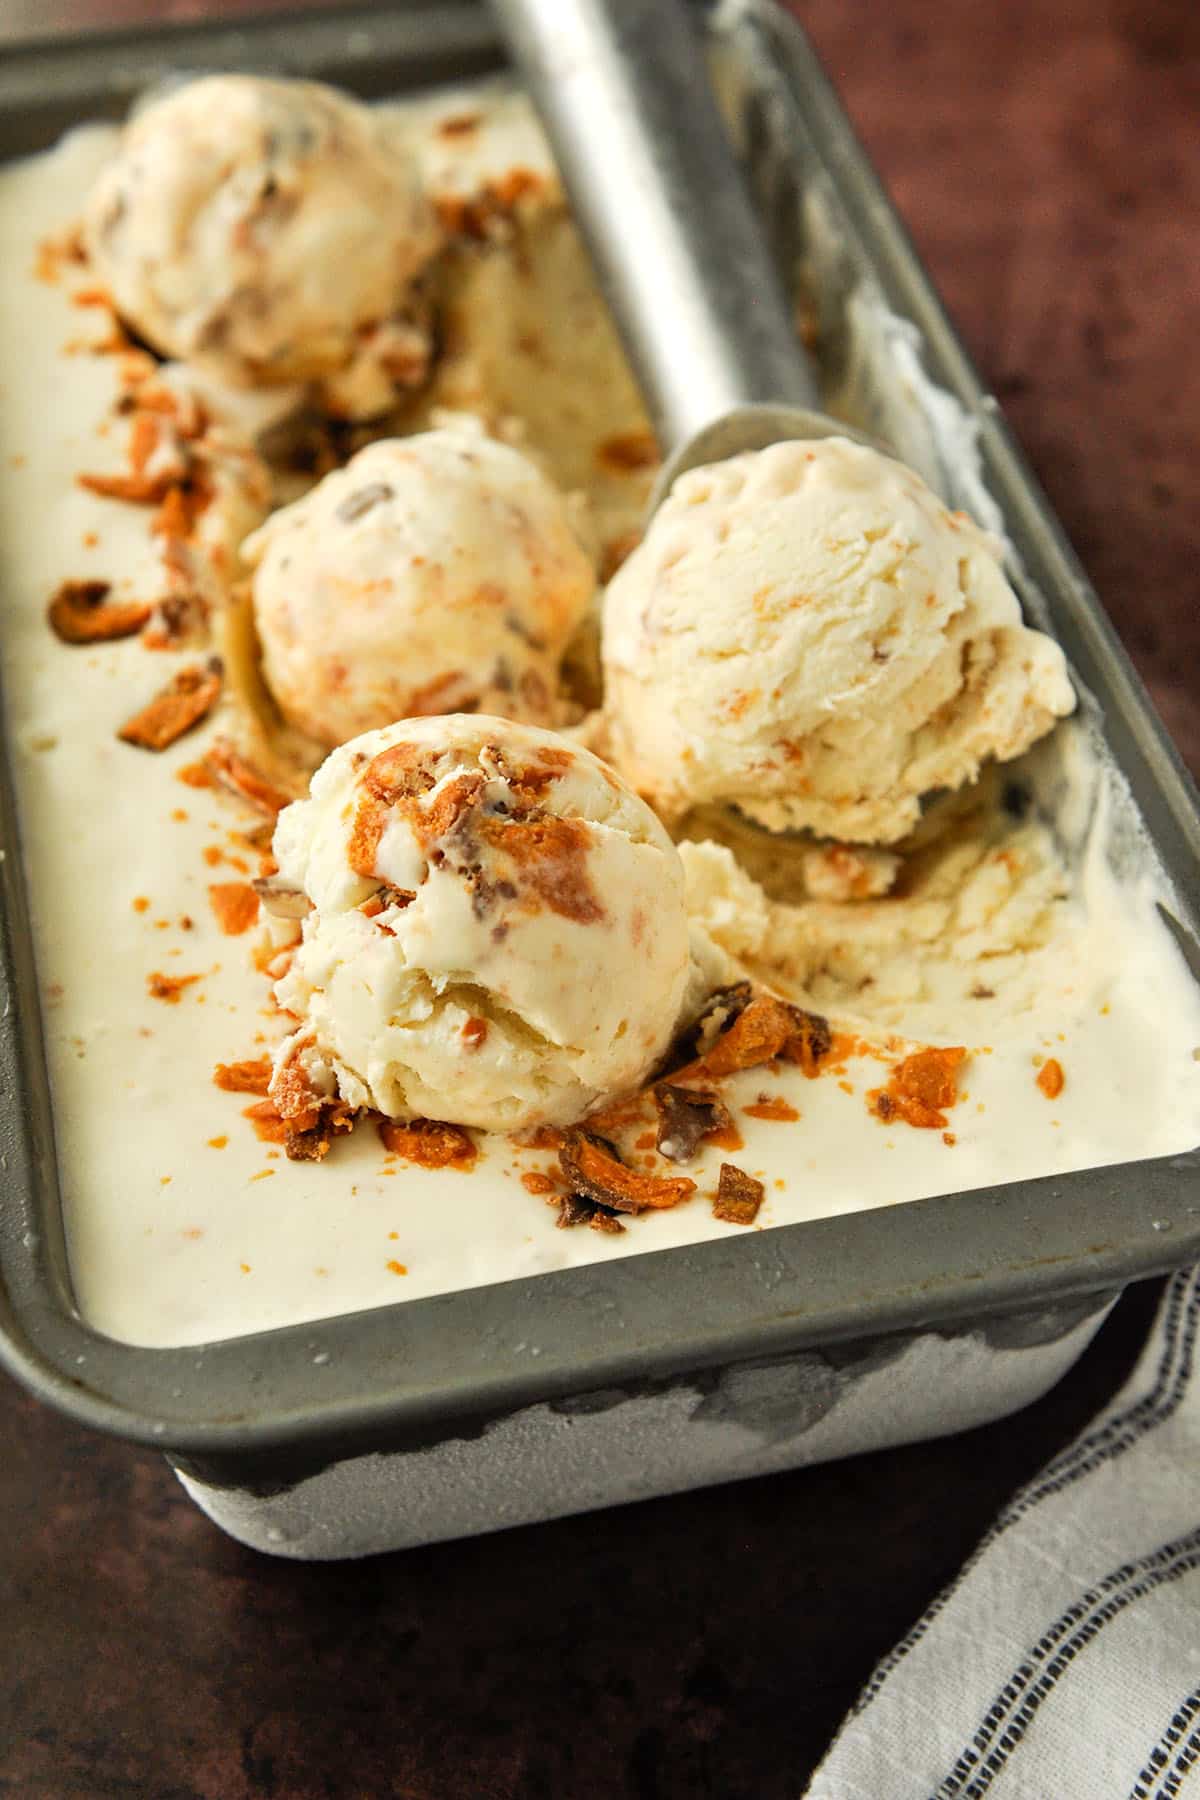
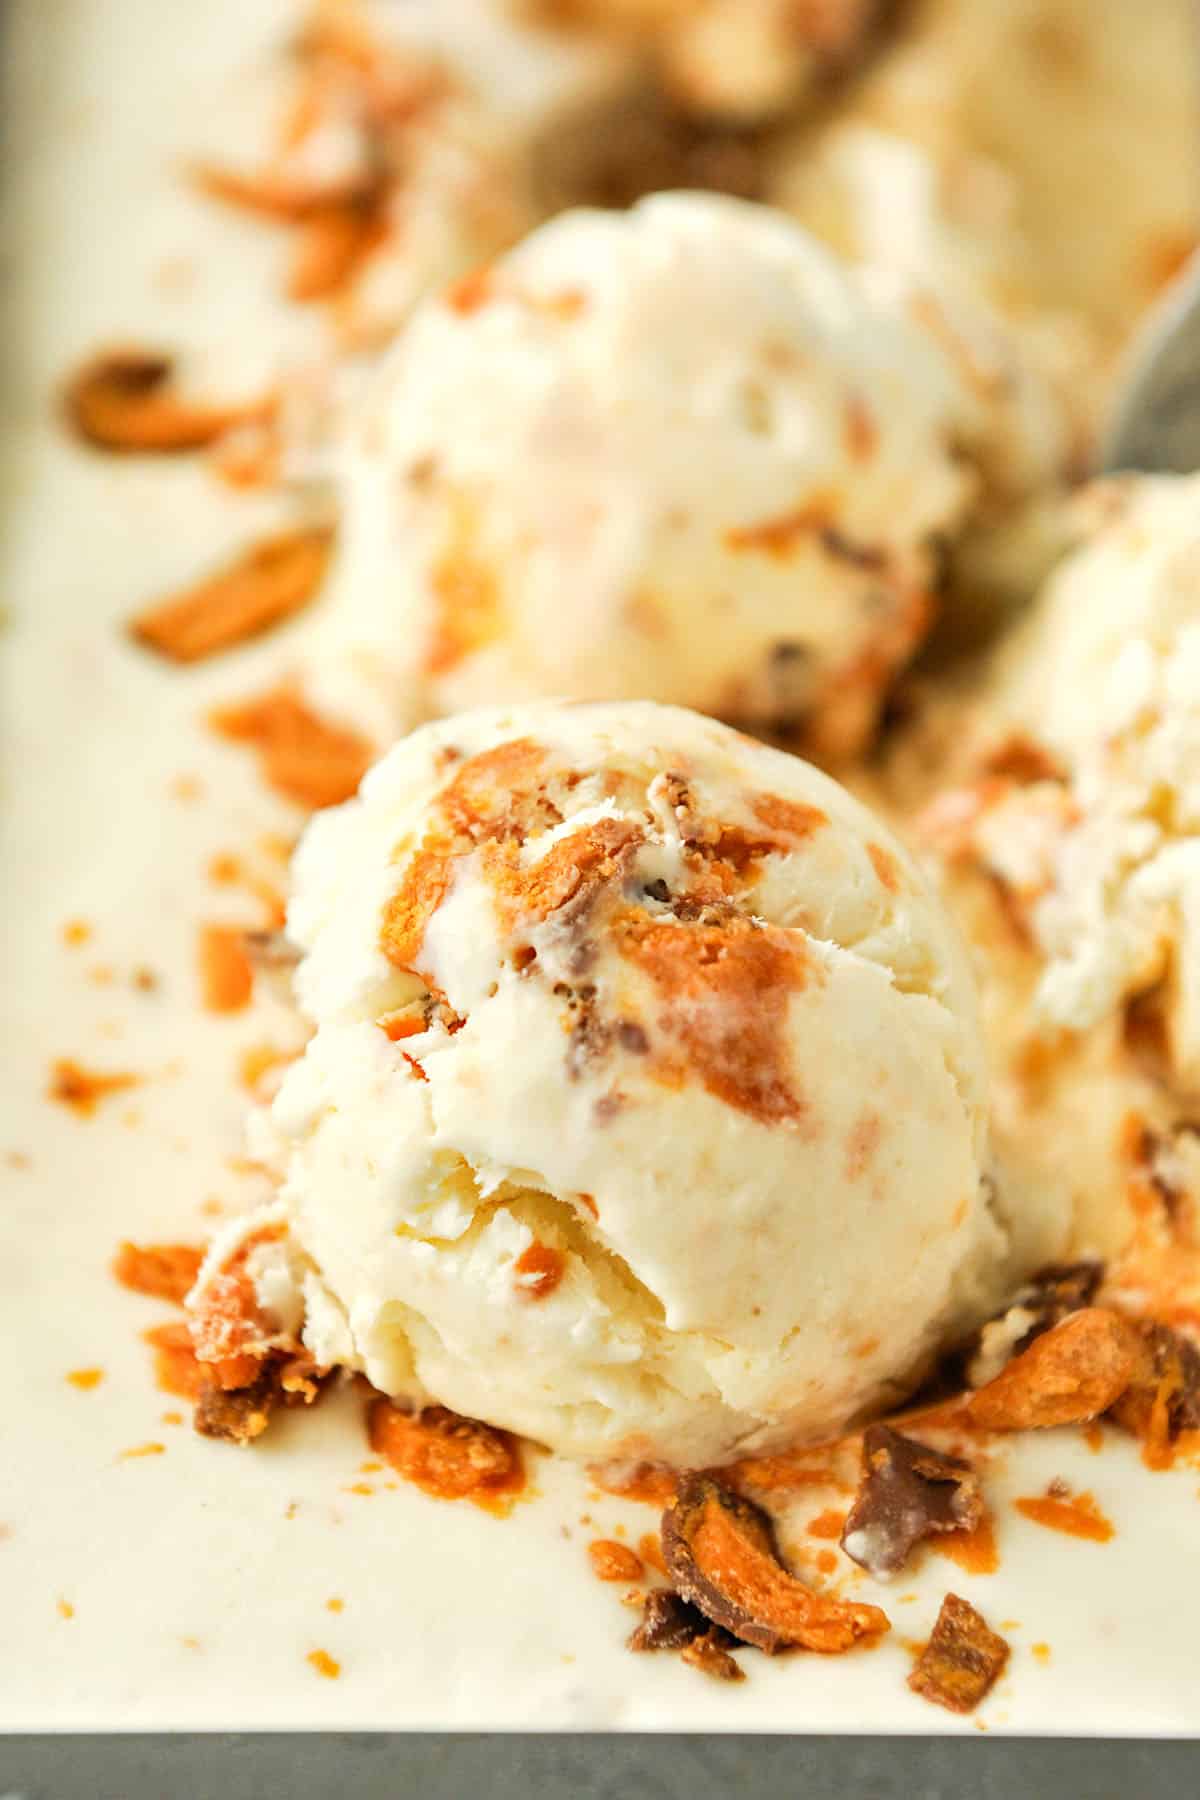
Make homemade Butterfinger Ice Cream filled with chunks of butterfinger candy pieces all in a creamy vanilla ice cream base. Easily make this crispity, crunchity ice cream right at home without the need for an ice cream maker.
Love dessert? So do we! Try this Butterfinger Poke Cake if you are a butterfinger lover, filled with a gooey peanut butter sauce and topped with butterfingers. Or make these Rocky Road Brownies, made with mini marshmallows, peanuts, and a chocolate drizzle.
Just when you thought that Butterfinger candy bars couldn’t get any better, you discover they can be made into an even more heavenly treat…ice cream!
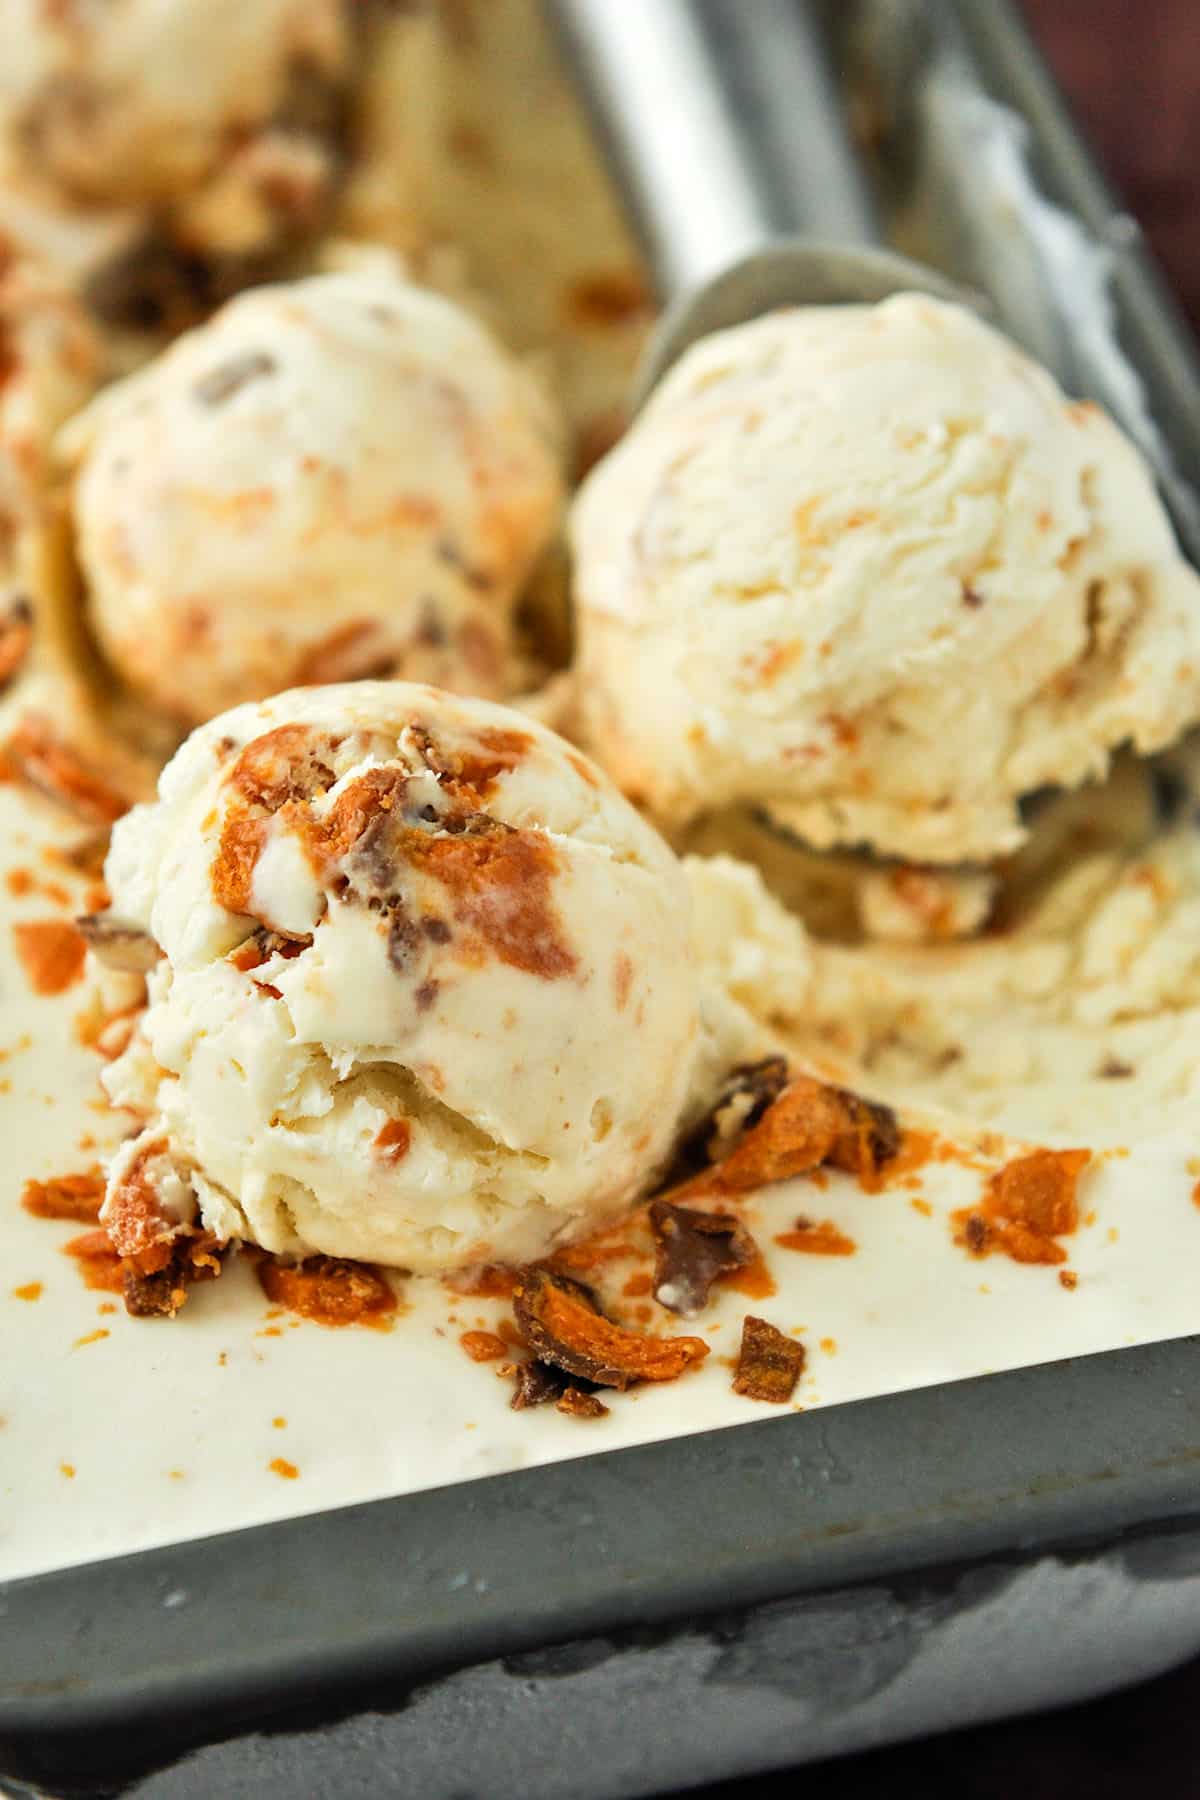
There are few candy bars more beloved than the Butterfinger. That peanut butter flavored interior has those crisp layers that are unbelievably crunchy. And then it’s all drenched in a coating of rich milk chocolate.
YUM!
Keep cool on those hot days, with this simple cold treat you will be craving all summer long and you don’t even need a machine to make it.
This homemade ice cream could not be any simpler!
If Butterfingers are your favorite candy bar, you have to try this ice cream. If you have a ninja creami, this protein chocolate ice cream is perfect.
What is No Churn Ice Cream?
Normally when you want to make at home ice cream, you need an ice cream maker. But, they can be pricey and take up a lot of room when you aren’t using them.
If you can believe it, no churn ice cream is made without using a machine.
Instead, heavy cream gets beat into whipped cream.
This is what gives this ice cream its light fluffy texture. Sweeten it with sweetened condensed milk, mix in butterfinger pieces, and pop it in the freezer for a few hours.
What to do with Butterfinger Ice Cream
- Make a butterfinger ice cream cake with this ice cream.
- Make ice cream sandwiches.
- Eat it as is! Serve it in an ice cream cone or a bowl.
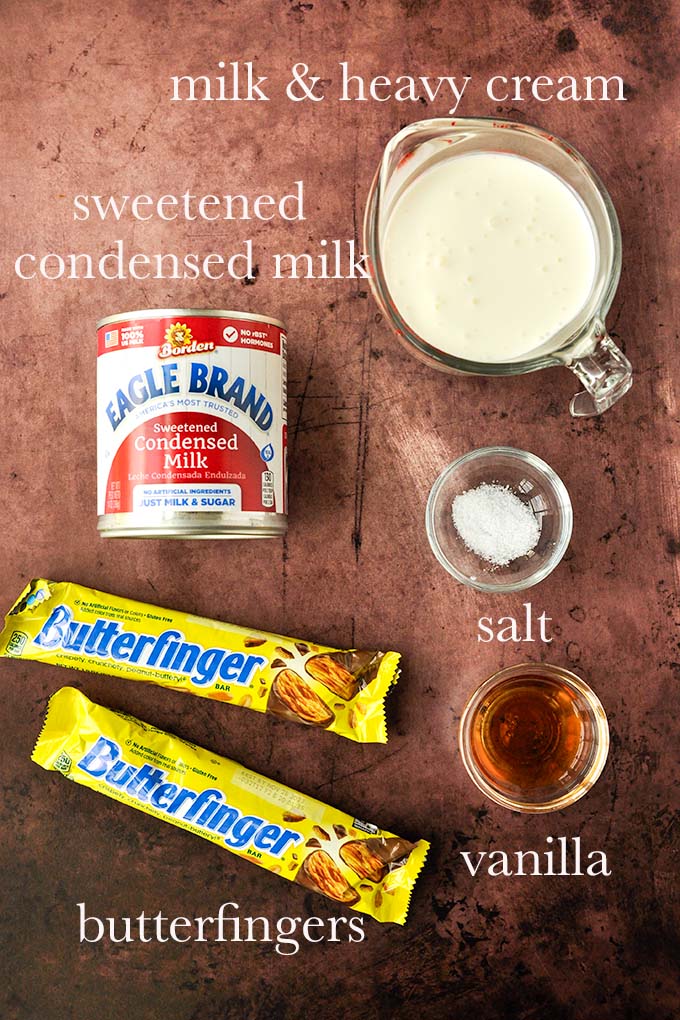
Butterfinger Ice Cream Ingredients
Just a handful of simple ingredients are needed to make homemade butterfinger ice cream. Check out the recipe card at the bottom of this blog post for full ingredient amounts.
- Butterfinger: Butterfinger candy bars add the perfect amount
- Sweetened Condensed Milk: You just need one can.
- Milk: I use whole milk to make it full-fat ice cream. I have not tried making this recipe with low fat or skim milk.
- Vanilla: Use real vanilla extract, not vanilla flavoring.
- Salt: Just a pinch is needed. I like to use fine salt for this recipe.
- Heavy Whipping Cream: Heavy cream makes this ice cream smooth and creamy. I also had a reader try it with just whipping cream for a lighter ice cream.
How to Make Butterfinger Ice Cream
If you are craving that classic butterfinger taste, you have to make this easy ice cream recipe. Check out the recipe card at the bottom of this blog post for full instructions.
STEP 1: Place the empty metal bowl of a stand mixer and the whipping attachment in the freezer.
STEP 2: On a cutting board chop up 4 of the butterfinger bars. Cut up the 6th butterfinger, but keep it separate from the others, it will get sprinkled on top of the ice cream.
STEP 3: In a large mixing bowl, combine together milk, condensed milk, vanilla, and salt. Set aside.
STEP 4: Pull the bowl out of the freezer and pour in the heavy whipping cream.
STEP 5: Begin whipping the cream at medium speed it should begin to thicken up around 4 minutes. Raise the speed up and continue beating the cream, after about 6-7 minutes you should get soft peaks. Which means that the cream on the whisk will stand but the tip with bend over. Continue beating the cream for only 1-2 minutes longer after you reach the soft peak stage. You want a mostly firm peak, which means it stands on its own or almost does. Stop here, if you continue on longer you will create butter.
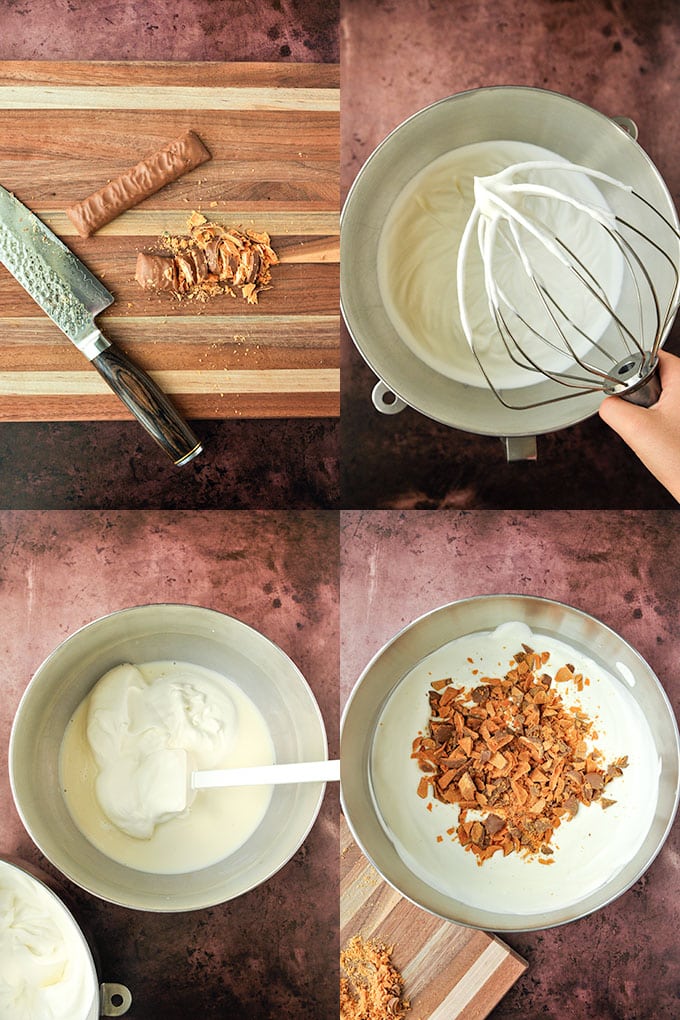
STEP 6: Gently fold the whipped cream into the sweetened condensed milk mixture in the large bowl.
STEP 7: Gently fold in the 5 cut up butterfinger bars.
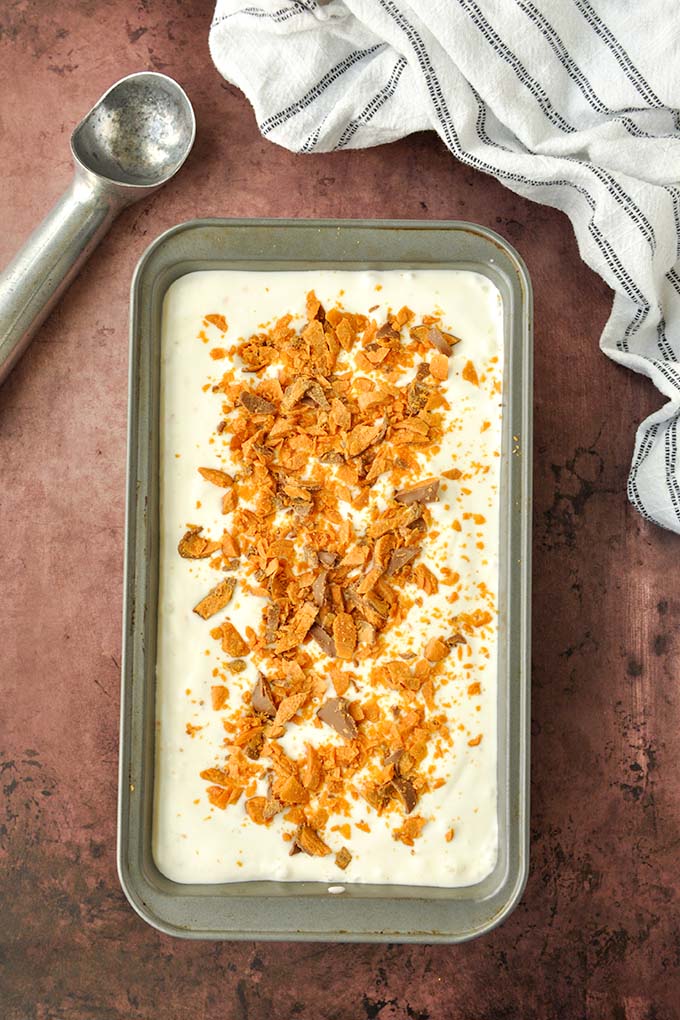
STEP 8: Pour the mixture into a 9 x 5 x 3-inch glass or metal loaf pan.
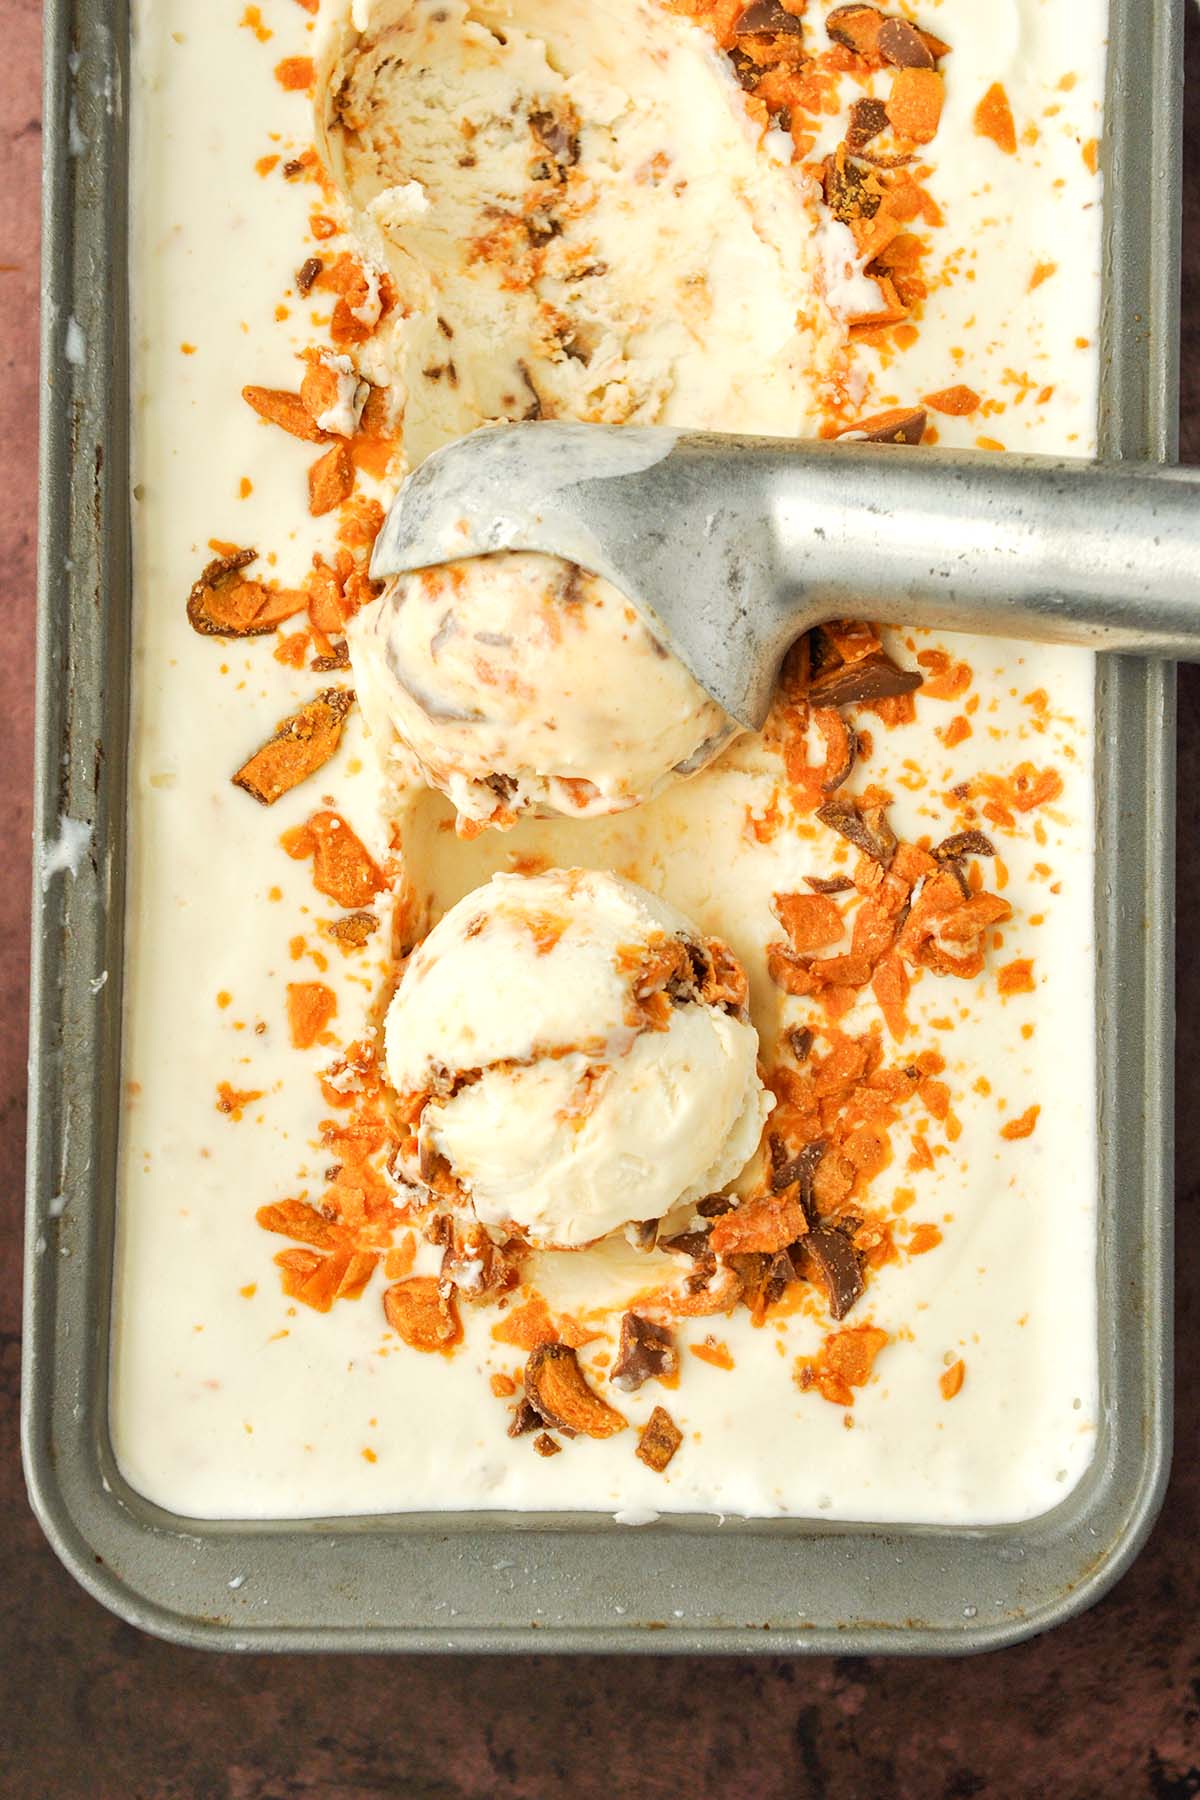
STEP 9: Sprinkle on the 6th butterfinger bar over the top of the ice cream. Cover really well with a tight fitting lid or aluminum foil.
STEP 10: Freeze for 6 hours or overnight, then serve.
Tips for Success
- Cold cream. The heavy cream will mix the best at a cold temperature. So make sure to keep your cream in the refrigerator right up until you are going to use it.
- Freeze bowl. Placing the metal mixing bowl and beaters in the freezer to make the whipped cream, will help the cream whip properly.
- Don’t over whip. Make sure not to over whip the cream or you will end up with butter and will have to start over with fresh cream.
- Cover tightly. Make sure to cover the container tightly so that it doesn’t get freezer burn.
Recipe Variations
- Size of pieces. The butterfingers can be cut into pieces as small or as big as you want. Bigger pieces are going to give you more of a crunch and smaller pieces will get well distributed throughout the ice cream.
- Add a swirl. Add a caramel or peanut butter swirl through the ice cream.
Frequently Asked Questions
Can I add different mix-ins? Yes, you could use other candy bars like Twix or Snickers or whatever your favorite is.
Can I add toppings? Yes, add your favorite toppings like whipped cream, caramel sauce, chocolate sauce, chopped nuts, or a cherry.
What is the difference between no churn ice cream and traditional ice cream? When making traditional ice cream at home you need an ice cream maker. No churn gets it’s fluffiness from making the heavy cream into whipped cream.
How to Store Butterfinger Ice Cream
Keep ice cream covered tightly in the freezer in an airtight container or wrapped well with plastic wrap and aluminum foil to keep from getting freezer burned. If it is wrapped really well, it should last 2-4 weeks.
Try these other sweet recipes!
- Butterfinger Poke Cake
- Raspberry Cheesecake Bars
- Butterscotch Brownies
- Coconut Macaroons
- Raspberry Brownies
- Mango Ice Pops
If you’ve tried this no churn butterfinger ice cream recipe, don’t forget to give me a star rating and leave me a comment below in the comment section. I love to hear from people who have made my recipes!
NEVER MISS A RECIPE!
Follow me on social media for more recipe ideas & inspiration!
PINTEREST / FACEBOOK / INSTAGRAM

No Churn Butterfinger Ice Cream
Ingredients
- 4 1.9 ounce butterfinger candy bars
- 14 ounce sweetened condensed milk
- 1 cup whole milk
- 2 teaspoons vanilla extract
- pinch of salt
- 2 cups heavy whipping cream
Instructions
- Place the empty metal bowl of a stand mixer and the whipping attachment in the freezer.
- On a cutting board chop up all of the butterfinger bars. Set aside 1/4 cup of chopped butterfinger to sprinkle on top of the ice cream if desired.
- In a large mixing bowl, combine together milk, condensed milk, vanilla, and salt. Set aside.
- Pull the bowl out of the freezer and pour in the heavy whipping cream.
- Begin whipping the cream at medium speed it should begin to thicken up around 4 minutes. Raise the speed up and continue beating the cream, after about 6-7 minutes you should get soft peaks. Which means that the cream on the whisk will stand but the tip with bend over. Continue beating the cream for only 1-2 minutes longer after you reach the soft peak stage. You want a mostly firm peak, which means it stands on its own or almost does. Stop here, if you continue on longer you will create butter.
- Gently fold the whipped cream into the sweetened condensed milk mixture.
- Gently fold in the cut up butterfinger bars.
- Pour the mixture into a 9 x 5 x 3-inch glass or metal loaf pan.
- Sprinkle on the 1/4 cup of the reserved butterfingers over the top of the ice cream. Cover really well with a tight fitting lid or plastic wrap and aluminum foil.
- Freeze for 6 hours or overnight, then serve.
Notes
- Size of pieces. The butterfingers can be cut into pieces as small or as big as you want. Bigger pieces are going to give you more of a crunch and smaller pieces will get well distributed throughout the ice cream.
- Add a swirl. Add a caramel or peanut butter swirl through the ice cream.
- Ice cream will last 2-4 weeks in an airtight container in the freezer.
Nutrition
Did you make this recipe?
Please let me know how it turned out!
I love hearing from you! Share a picture of the recipe on Instagram and hashtag it #homecookedharvest.
Leave a Reply