

No bake desserts like these Easter bunny tails are so easy to make and great for little hands. If you are looking for more no bake ideas, try out these Nutella Truffles, use any colored sprinkles to match holidays. These Lucky Charms Bars, cute for St. Paddy’s Day or Easter, but are yummy all year long.
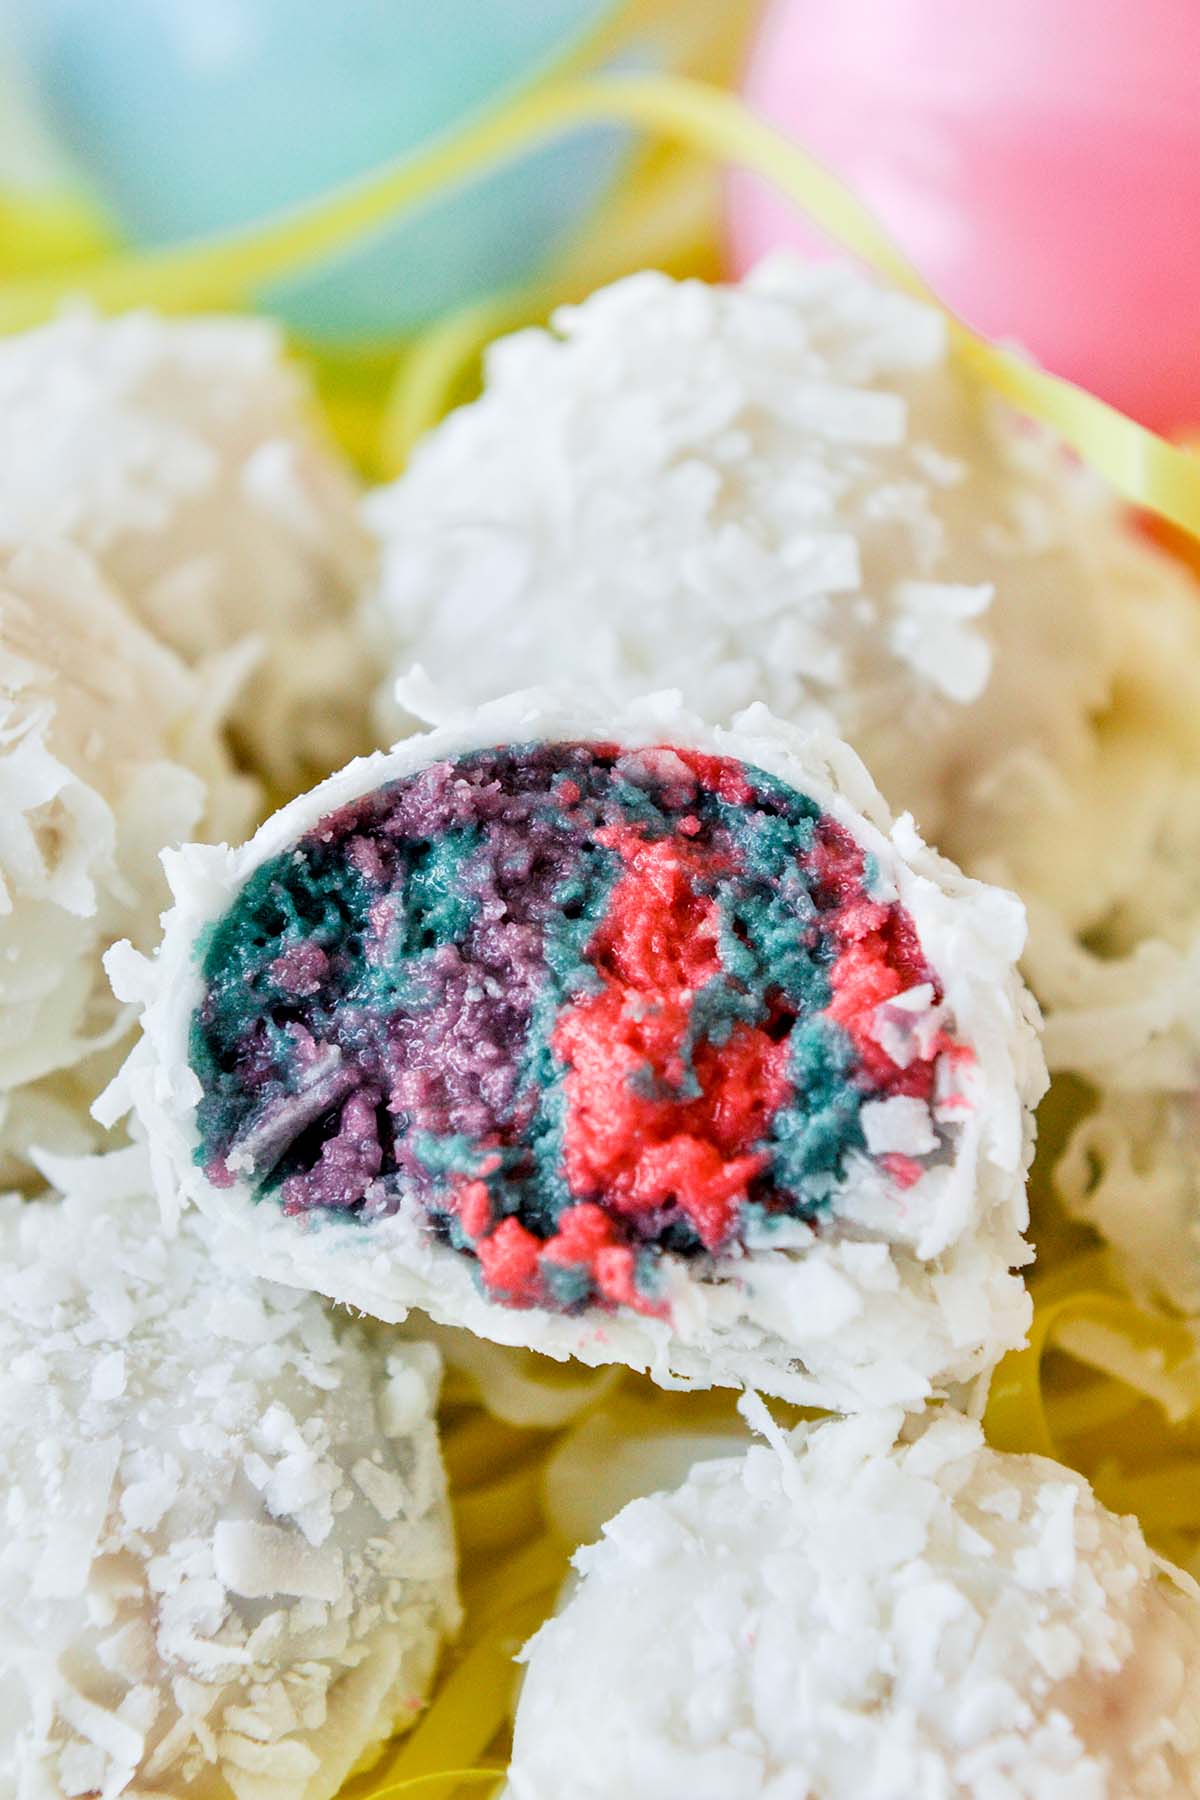
Easter Bunny Truffles
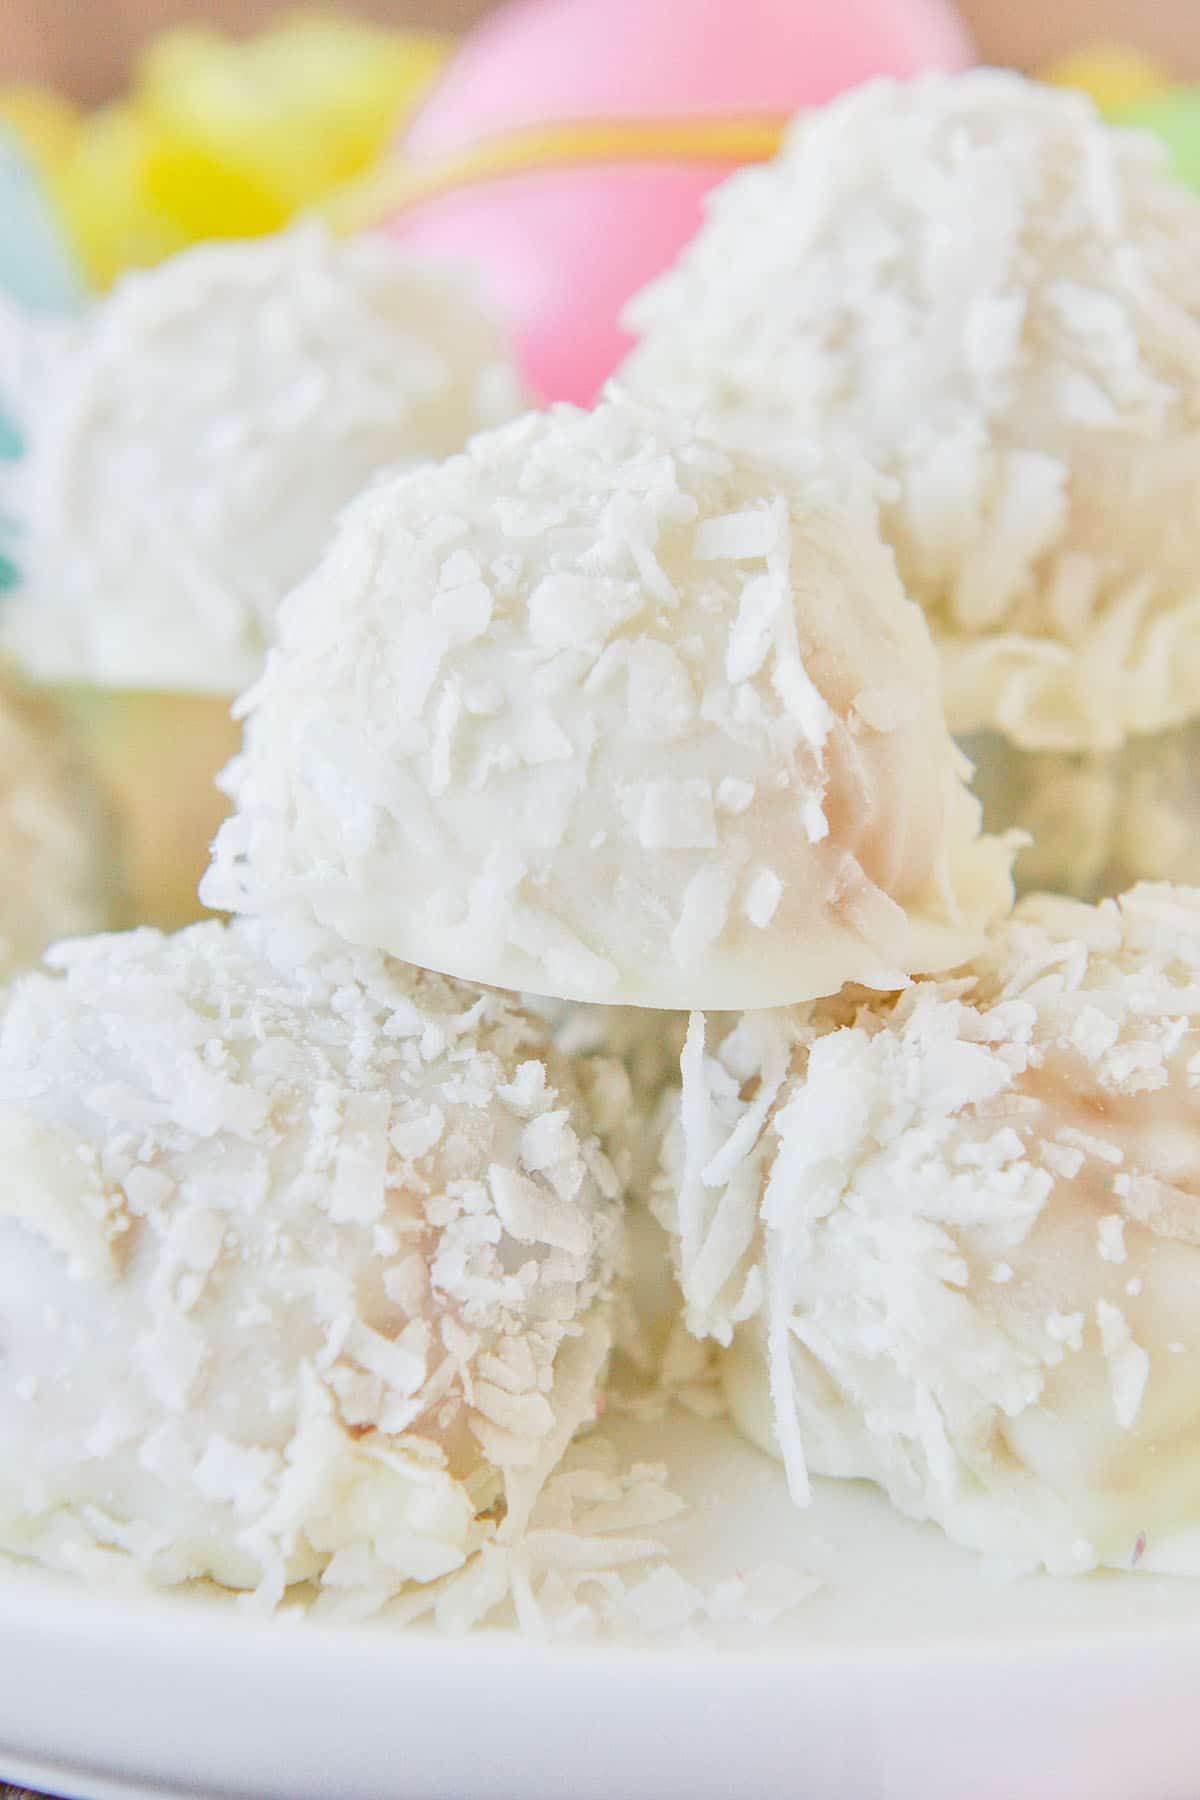
Are you looking for a fun (and quick!) Easter recipe to make this spring? You have found the perfect recipe! This cute mini Easter dessert is going to put a smile on your face and they are so yummy, too. They will laugh at this funny Easter bunny cake. This would be a great food craft to make with kids. They are pretty messy, but kids love getting their hands dirty.
Let your creativity run free on these little rabbit tail truffles. You could do so many cute ideas with them. Dye the coconut a cute pastel color to put on the outside. Or leave off the coconut all together and sprinkle on some cute jimmies or colored sugar. Or drizzle on some melted chocolate.
Make another Easter treat by trying air fryer creme eggs in a croissant!
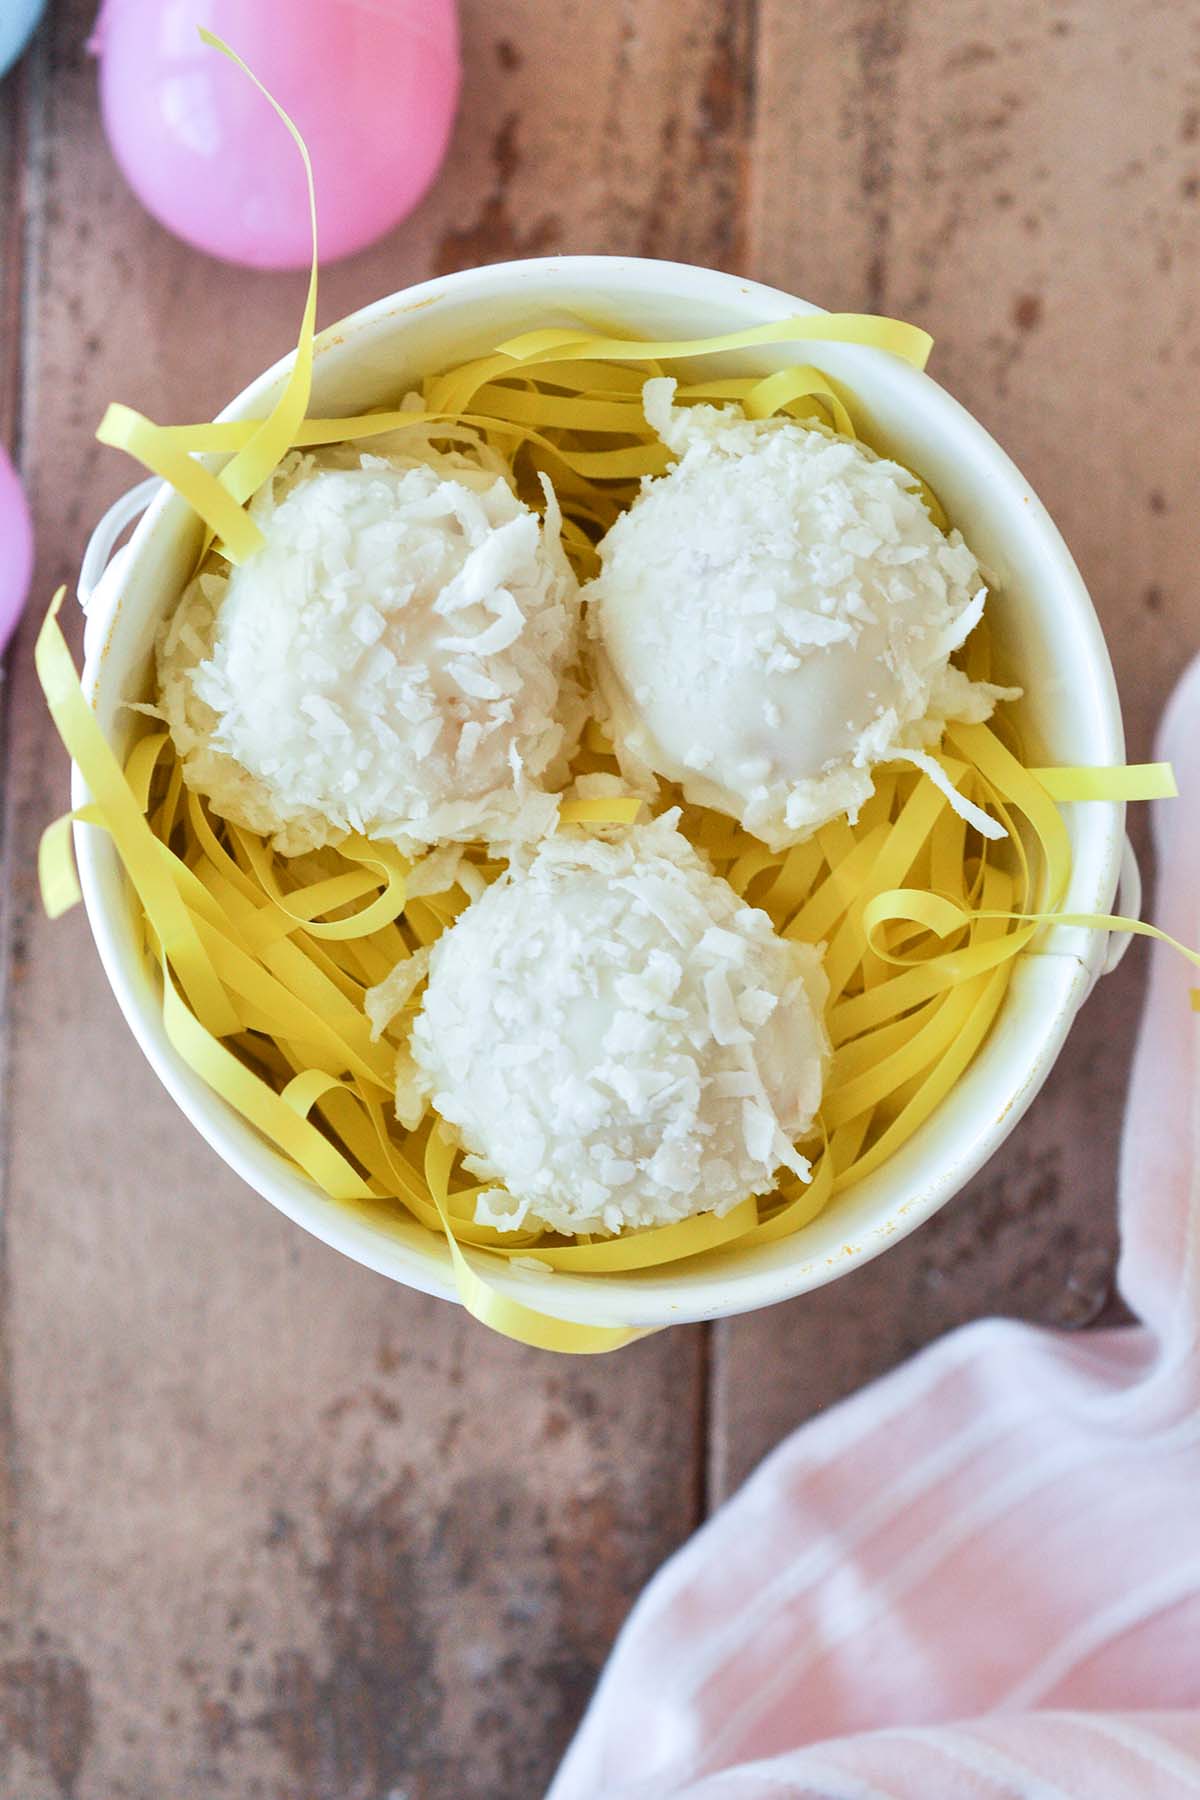
Why You’ll love this Bunny Tail Recipe
- It’s no bake! Yes, it doesn’t get better than that. No bake recipes are the best.
- Great for kids. Get your kids involved in making some special Easter treats.
- Fun & messy. This recipe is a little messy, but definitely fun.
- Few ingredients. Only 4 ingredients are needed to make these Oreo truffles.
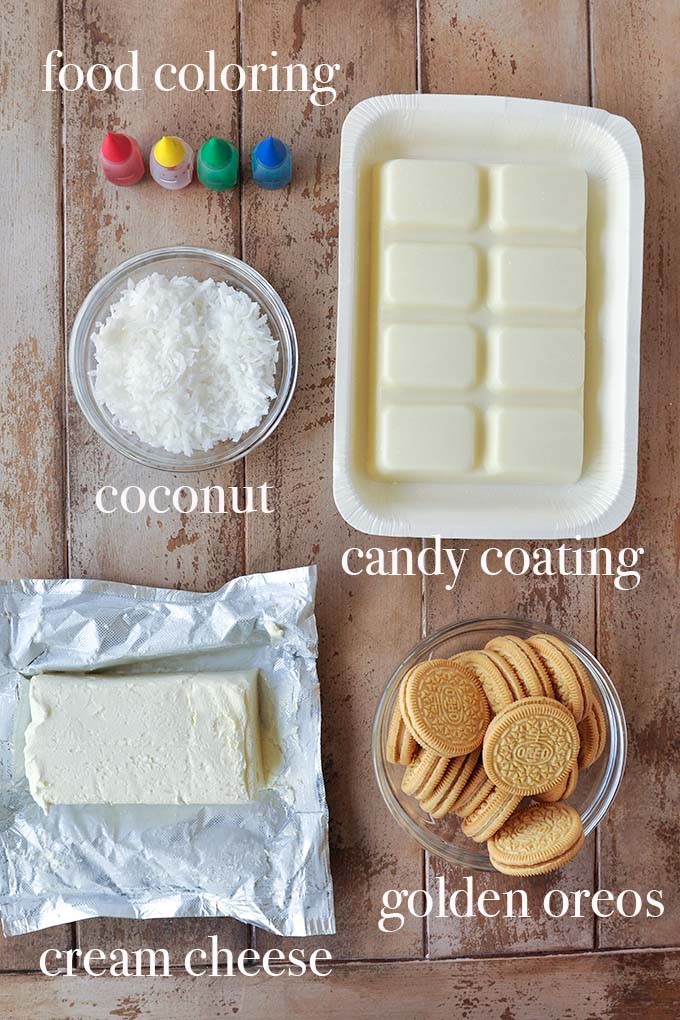
Easter Bunny Tail Ingredients
- Oreos: You want to get the golden Oreos so that they are a nice light color. Not the double stuffed ones.
- Cream Cheese: You will need the block style cream cheese that is full fat. Make sure to pull it out of the refrigerator to soften it a couple hours before making.
- Food Coloring: This is to dye the truffle filling. It is completely optional, you can leave out the added coloring.
- Melting Chocolate: Get the white chocolate flavored melts. These are also called candy coating, candy melts or almond bark. I personally love the candy coating that comes in the tray. You just pop the tray in the microwave to melt it.
- Coconut: I use flakey sweetened coconut.
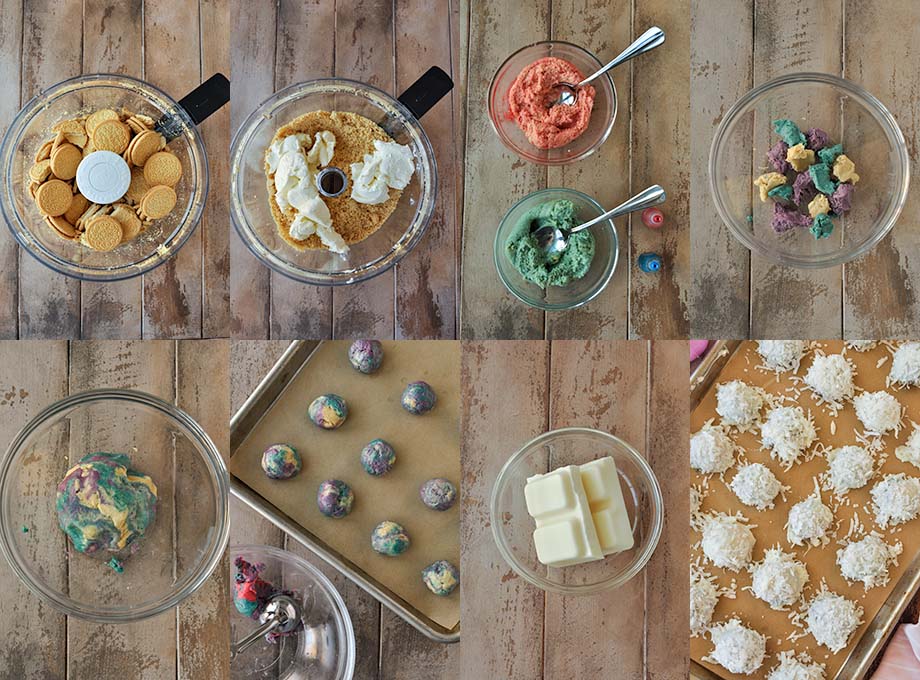
How to Make Bunny Tails
Here are the basic instructions for making bunny tail truffles. For the full instructions and ingredients, check out the recipe card down below.
- Line a baking sheet with parchment paper or wax paper.
- In a food processor add in Oreos, combine until the Oreos are in crumbs.
- Add in the cream cheese chunks. Pulse until it starts forming a ball.
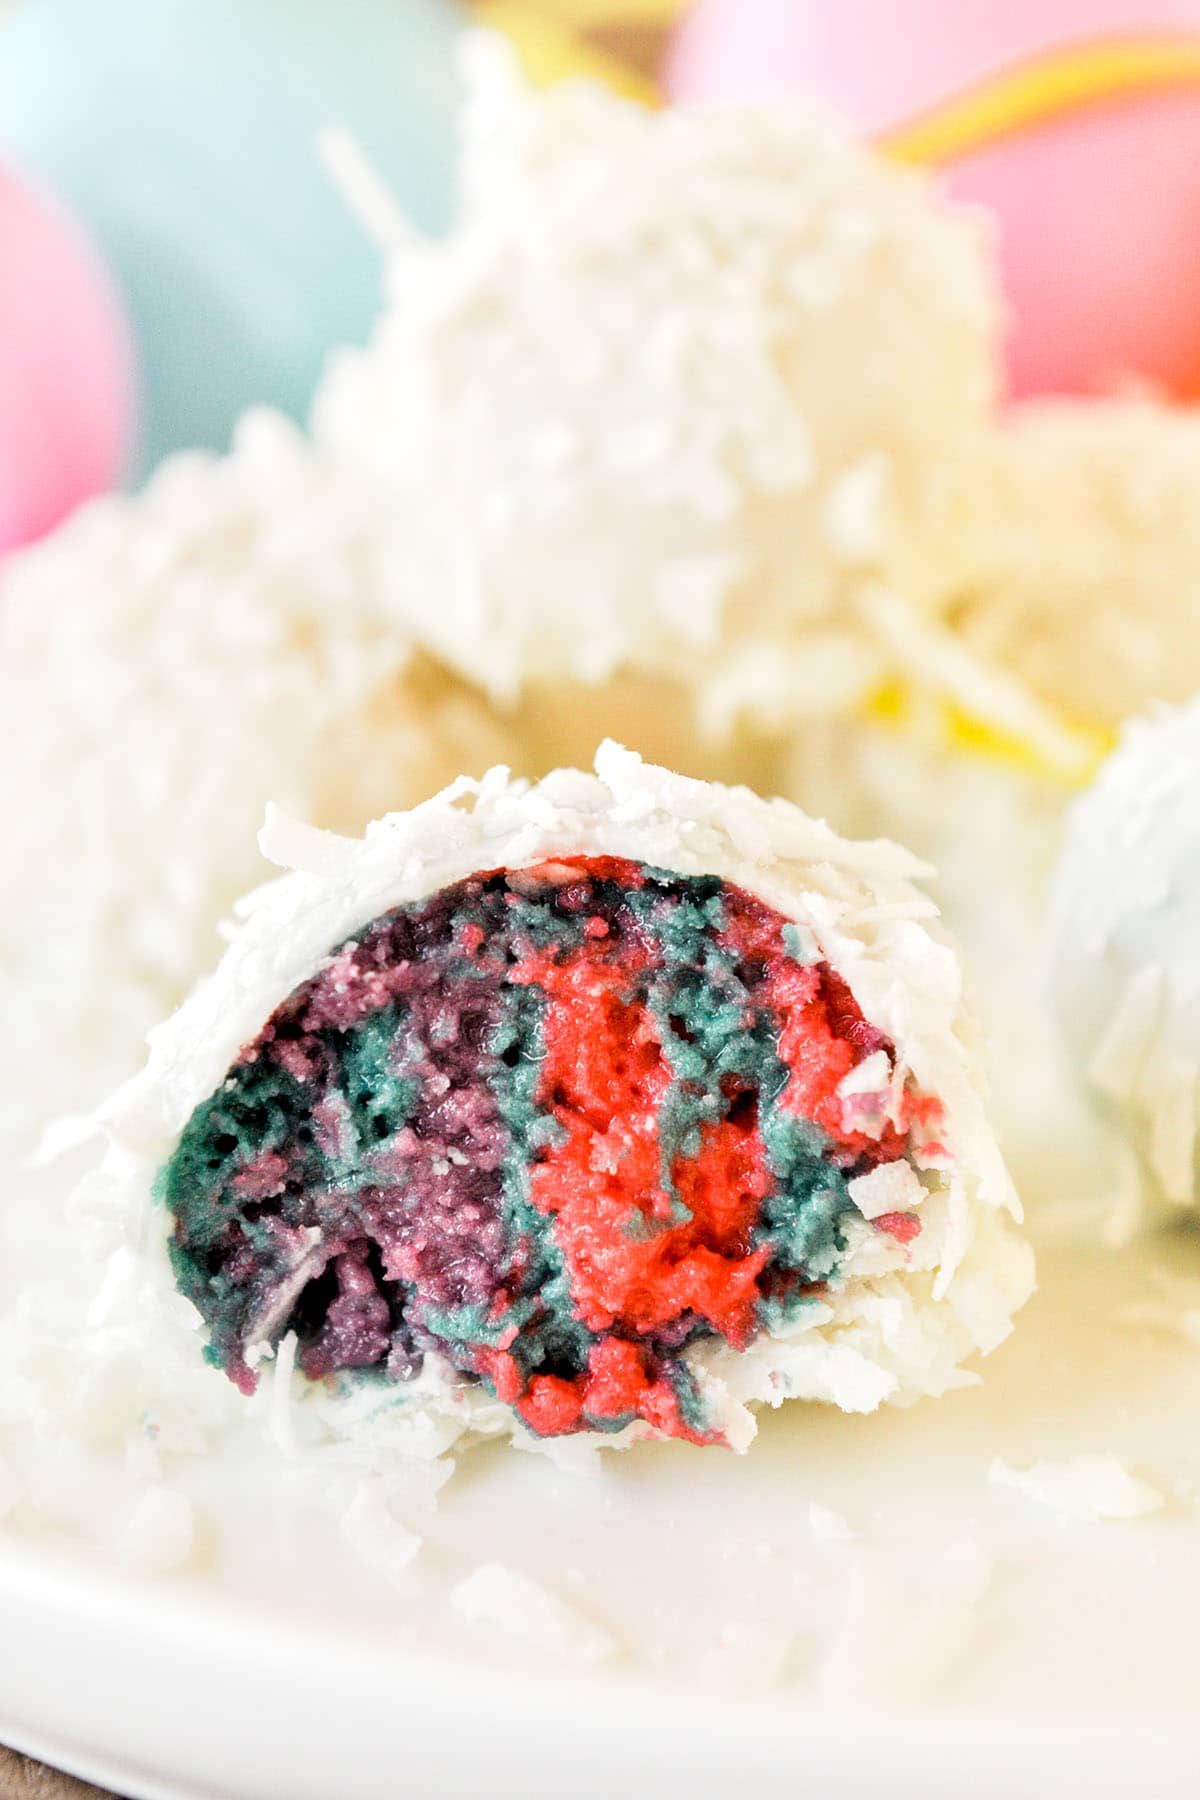
- Split the dough into thirds or fourths. Add a couple drops of the chosen color to each ball of dough until you get the color you desire. I used red and blue to make purple. Added drops of blue with a couple drops of green to make the blue. And just red to make a pink color. I then gently mixed them together to make a marbled effect. I also kept part of the dough its actual color and didn’t add any color.
- Chill the dough for 30 minutes in the refrigerator in individual bowls.
- Tear off small pieces of the dough and put them into a bigger bowl, varying the colors. Smush all of it into one big ball and twist the dough to make a marbles effect.
- Use a tablespoon sized dough scoop to scoop the dough, rolling between your hands. Place the truffle balls onto the prepared baking sheet.
- Chill the Oreo balls for 30-60 minutes in the freezer or until they are firm.
- Pour the coconut flakes into a shallow bowl, set aside.
- Melt the almond bark according to the package instructions. My instructions said to heat for one minute and then 15 seconds at a time, stirring in between each heating cycle. Follow the instructions on your packaging.
- Place a truffle on a fork and use a spoon to scoop the melted chocolate over the truffle to make sure it’s completely covered. Tap off any excess chocolate.
- Immediately sprinkle on coconut flakes and place back on cookie sheet. Repeat until you are through all the Oreo balls.
- Chill according to the package directions on the melting chocolate (mine said 2-5 minutes). And they are ready to enjoy!
Bunny Tail Recipe Tips
- Decorate quickly. After dipping a truffle into the melted chocolate immediately coat it with the coconut before the chocolate hardens or else it won’t stick.
- White chocolate. Make sure not to add any water or food dye to the actual white chocolate because it will cause it to seize. You can add one teaspoon coconut oil or vegetable shortening to candy melts if you are using them to make the mixture creamy.
- Cream cheese. Only use full fat block style cream cheese. Any of the low fat or whipped varieties may not set up correctly. Make sure that it is at room temperature before using.
- Use a fork. I like to use a fork when dipping the truffles into the white chocolate, it’s super helpful.
- Keep in fridge. Store these in the refrigerator since they are made with cream cheese.
Easter Bunny Recipes Variations
- Dyed coconut. Dye the coconut for a pretty pop of color! Instructions are below.
- Mix up the flavors. Use any flavor of Oreos to make different flavored truffles. The original Oreos will make chocolate flavored truffles, mint Oreos will make mint truffles, birthday cake Oreos will make cake flavored truffles. Oreo often has specialty flavors come out, too so check for those.
- Add sprinkles. Instead of coating these truffles in coconut, add sprinkles or colored sugar to the outside.
- Leave out the dye. Adding the dye to color the inside is optional. You can just leave them the color that they are.
How to dye coconut?
Easter desserts are always so cute, I love all the pastel colors. These little bunny tails would be so cute with pastel colored coconut rolled on the outside. To easily make your own colored coconut add the coconut to a plastic zip bag. Add a couple drops of your desired color and shake it all around to completely coat the coconut.
Frequently Asked Questions
How long will Oreo truffles last in the fridge? These truffles should last about a week in an air tight container in the refrigerator.
Can these bunny tail truffles be frozen? Yes, these truffles freeze well. The instructions are below.
Storage Instructions
How to refrigerate bunny tails? Once the bunny tails have completely set, put them into an air tight container. It should last about 1week in the fridge.
How to freeze bunny tails? Let truffles set completely before putting into an air tight, freezer safe container. They can be frozen for 3-6 months, just be sure to label with the recipe and date.
How to thaw frozen Oreo truffles? Thaw frozen bunny tail truffles in the refrigerator overnight or at room temperature until defrosted.
Try these other sweet recipes!
- Baileys Irish Cream Cookies
- Coconut Macaroons
- Snickerdoodle Bars with Cinnamon Frosting
- Lemon Cooler
- Fluffernutter Cookies
If you’ve tried this Easter bunny tail recipe, don’t forget to rate the recipe and leave me a comment below. I love to hear from people who have made my recipes!
NEVER MISS A RECIPE!
Follow me on social for more recipe ideas & inspiration!
PINTEREST / FACEBOOK / INSTAGRAM
Easter Bunny Tails
Ingredients
- 15 ounce golden Oreo sandwich cookies
- 8 ounce full fat cream cheese, softened, cut into chunks
- food coloring, optional
- 16 ounce melting chocolate, candy melts or almond bark
- 7 ounce bag shredded coconut
Instructions
-
Line a baking sheet with parchment paper or wax paper.
-
In a food processor add in Oreos, combine until the Oreos are in crumbs.
-
Add in the cream cheese chunks. Pulse until it starts forming a ball and is well mixed.
-
Split the dough into thirds or fourths. Add a couple drops of the chosen color to each ball of dough until you get the color you desire. I used red and blue to make purple. Added drops of blue with a couple drops of green to make the blue. And just red to make a pink color. I then gently mixed them together to make a marbled effect. I also kept part of the dough its actual color and didn't add any color.
-
Chill the dough for 30-45 minutes in the refrigerator in individual bowls.
-
Form dough into 1 tablespoon sized balls, rolling between your hands. Place the truffle balls onto the prepared baking sheet.
-
Tear off small pieces of the dough and put them into a bigger bowl, varying the colors. Smush all of it into one big ball and twist the dough to make a marbled effect.
-
Use a tablespoon sized dough scoop to scoop the dough, rolling between your hands. Place the truffle balls onto the prepared baking sheet. Chill the Oreo balls for 30-60 minutes in the freezer or until they are firm.
-
Pour the coconut flakes into a shallow bowl, set aside.
-
Melt the almond bark according to the package instructions. My instructions said to heat for 15 seconds at a time, stirring in between each heating cycle.
-
Place a truffle on a fork and use a spoon to scoop the melted chocolate over the truffle to make sure it's completely covered. Tap off any excess chocolate.
-
Immediately sprinkle on coconut flakes and place back on cookie sheet. Repeat until you are through all the Oreo balls.
-
Chill according to the package directions on the melting chocolate (mine said 2-5 minutes).
Equipment
-
Food Processor
Recipe Notes
- Decorate quickly. After dipping a truffle into the melted chocolate immediately coat it with the coconut before the chocolate hardens or else it won’t stick.
- White chocolate. Make sure not to add any water or food dye to the actual white chocolate because it will cause it to seize. You can add one teaspoon coconut oil or vegetable shortening to candy melts if you are using them to make the mixture creamy.
- Cream cheese. Only use full fat block style cream cheese. Any of the low fat or whipped varieties may not set up correctly. Make sure that it is at room temperature before using.
- Use a fork. I like to use a fork when dipping the truffles into the white chocolate, it’s super helpful.
- Keep in fridge. Store these in the refrigerator since they are made with cream cheese.
* Please note that all nutrition information are just estimates. Values will vary among brands, so we encourage you to calculate these on your own for most accurate results.
Nutrition Information
Did you make this recipe?
Please let me know how it turned out!
If you’ve tried this or any other of my recipes, don’t forget to rate the recipe below and leave me a comment. I love hearing from you! Share a picture on Instagram and hashtag it #homecookedharvest.





Leave a Reply